Records
Ledger showing all records across accounts.
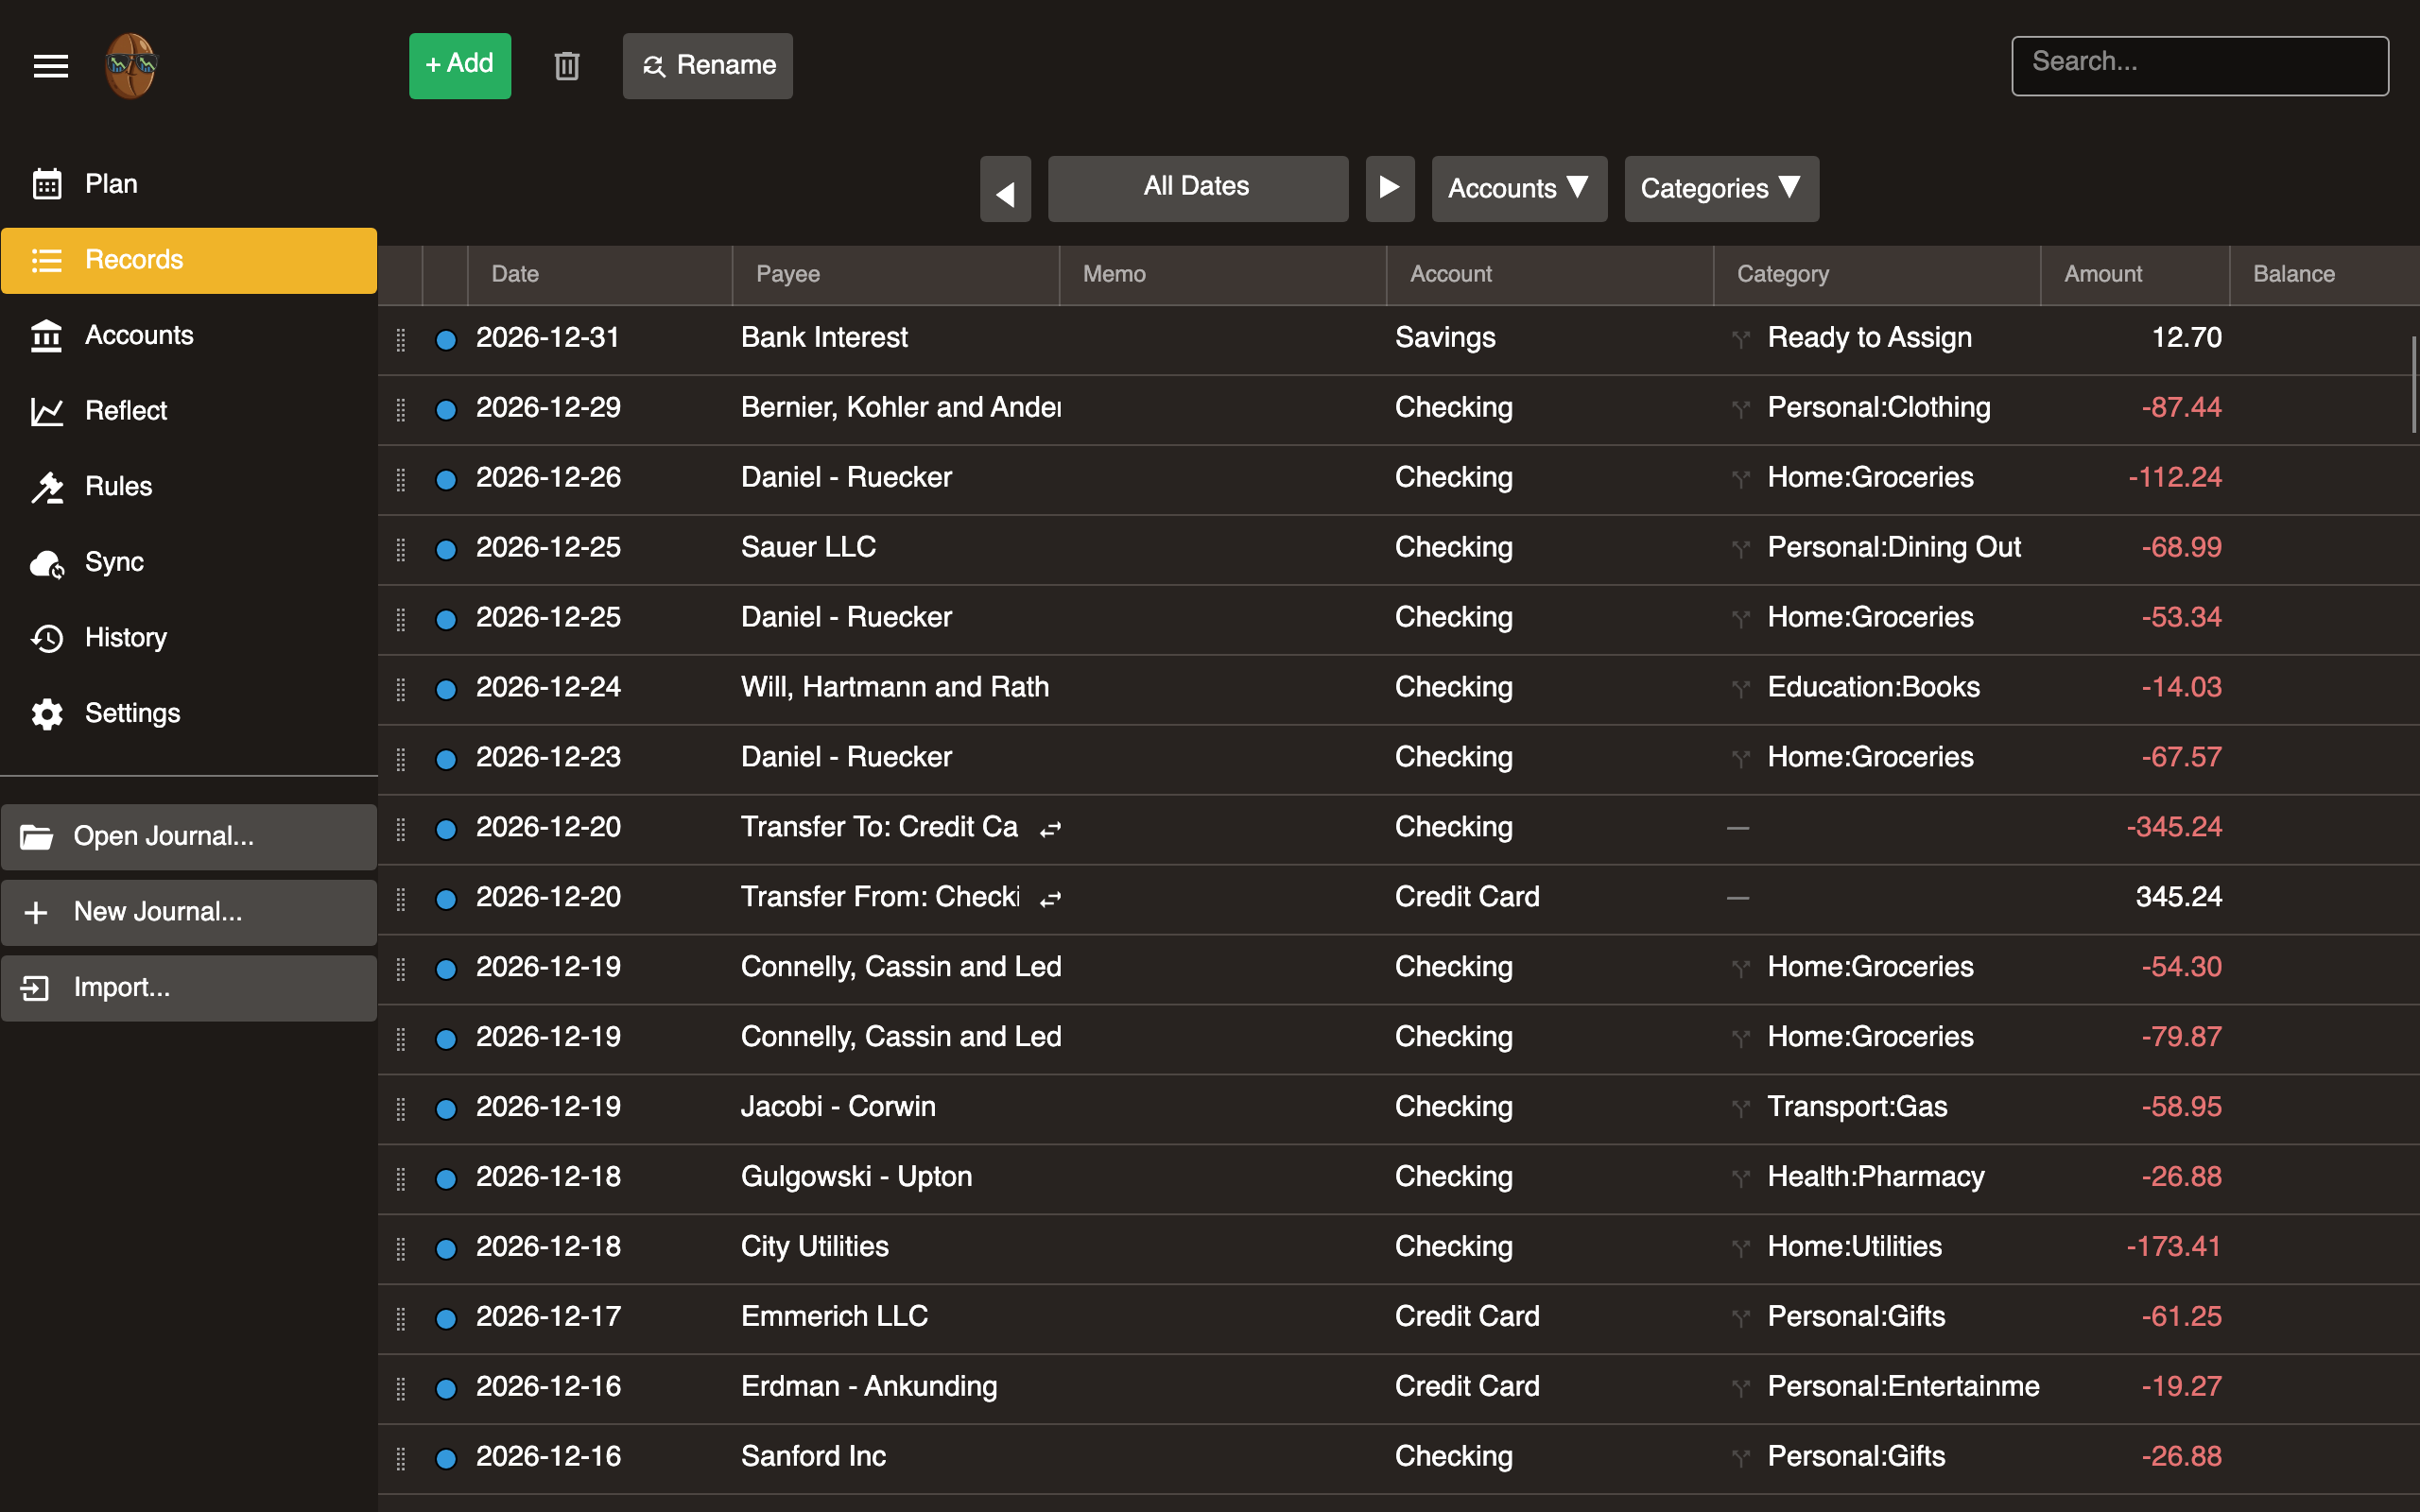
Columns
Each row has the following columns from left to right:
Grip handle. Drag a record up or down to reorder it. Drop it between rows to change its date. The record takes the date of the row below the drop line. Dropping above the first row sets the date to today.
Status dot. A colored circle showing the record’s cleared status:
- Blue - New
- Orange - Pending
- Grey - Cleared
Click the dot to cycle through statuses. If multiple records are selected, clicking any selected dot cycles all of them together. Hover for a tooltip describing the current status and next action.
These map to hledger’s record status markers: New has no marker, Pending is !, and Cleared is *. Use any workflow you like. For example, mark imported records as Pending and flip them to Cleared once you’ve verified them against your bank statement.
Date, Payee, Memo, Account, Category, Amount, Balance. Standard record fields. Balance is visible only when a single account is selected.
Selecting records
Click a row to select it.
Cmd+Click (macOS) or Ctrl+Click (Windows/Linux) to toggle individual rows in and out of the selection.
Shift+Click to select a range of rows from the current selection anchor to the clicked row.
Filter bar
Narrow the visible records.
Date range. Select a preset (Today, This Month, This Year, All) or a custom date range.
Account. Select one account. When a single account is selected, a cumulative running balance column appears.
Category. Filter to records in a specific budget category.
Search. Free-text search across payee and memo fields.
Adding a record
Click + Add. Fill in date, payee, amount, account, category, and optionally memo. Press Enter or click away to save.
A record is committed to your journal immediately.
Editing a record
Click a field to edit inline. Changes save when you click away or press Enter.
Editable fields: date, payee, amount, account, category, memo.
Splitting a record
Expand a row to view its postings. Split one record across multiple categories, such as a store receipt split between Groceries and Household.
Deleting records
Select one or more records. Click Delete or press the Delete key. A confirmation banner appears. Press Delete again to confirm, or Escape to cancel. Selected rows are highlighted in red while pending confirmation.
Renaming multiple records
Click Rename to open the bulk find-and-replace tool. Select a scope (payee, memo, category, or account), search for a value, and replace it across matching records.
Transfers
A transfer is a record between two asset/liability accounts. Enter both account names in the record. Surebeans marks the movement as a transfer. Click the swap icon on a transfer row to filter and show both sides.
You can also click Transfer to build one in a dialog: pick the two accounts and the amount. If the two accounts use different currencies, the dialog becomes a currency exchange and also asks for the amount received, recording both real amounts and the rate between them. See Multi-Currency.
Reordering records
Drag a row by its grip handle (the leftmost column). A blue line shows where the record will land. The record takes the date of the row below the drop line, or today’s date if dropped above the first row.
Reconciliation
Click the status dot to cycle a record’s cleared status: New (blue) → Pending (orange) → Cleared (grey). When multiple records are selected, clicking any dot in the selection cycles all selected records to the same status.
Infinite scroll
Records load progressively as you scroll. No pagination controls needed.
Attachments
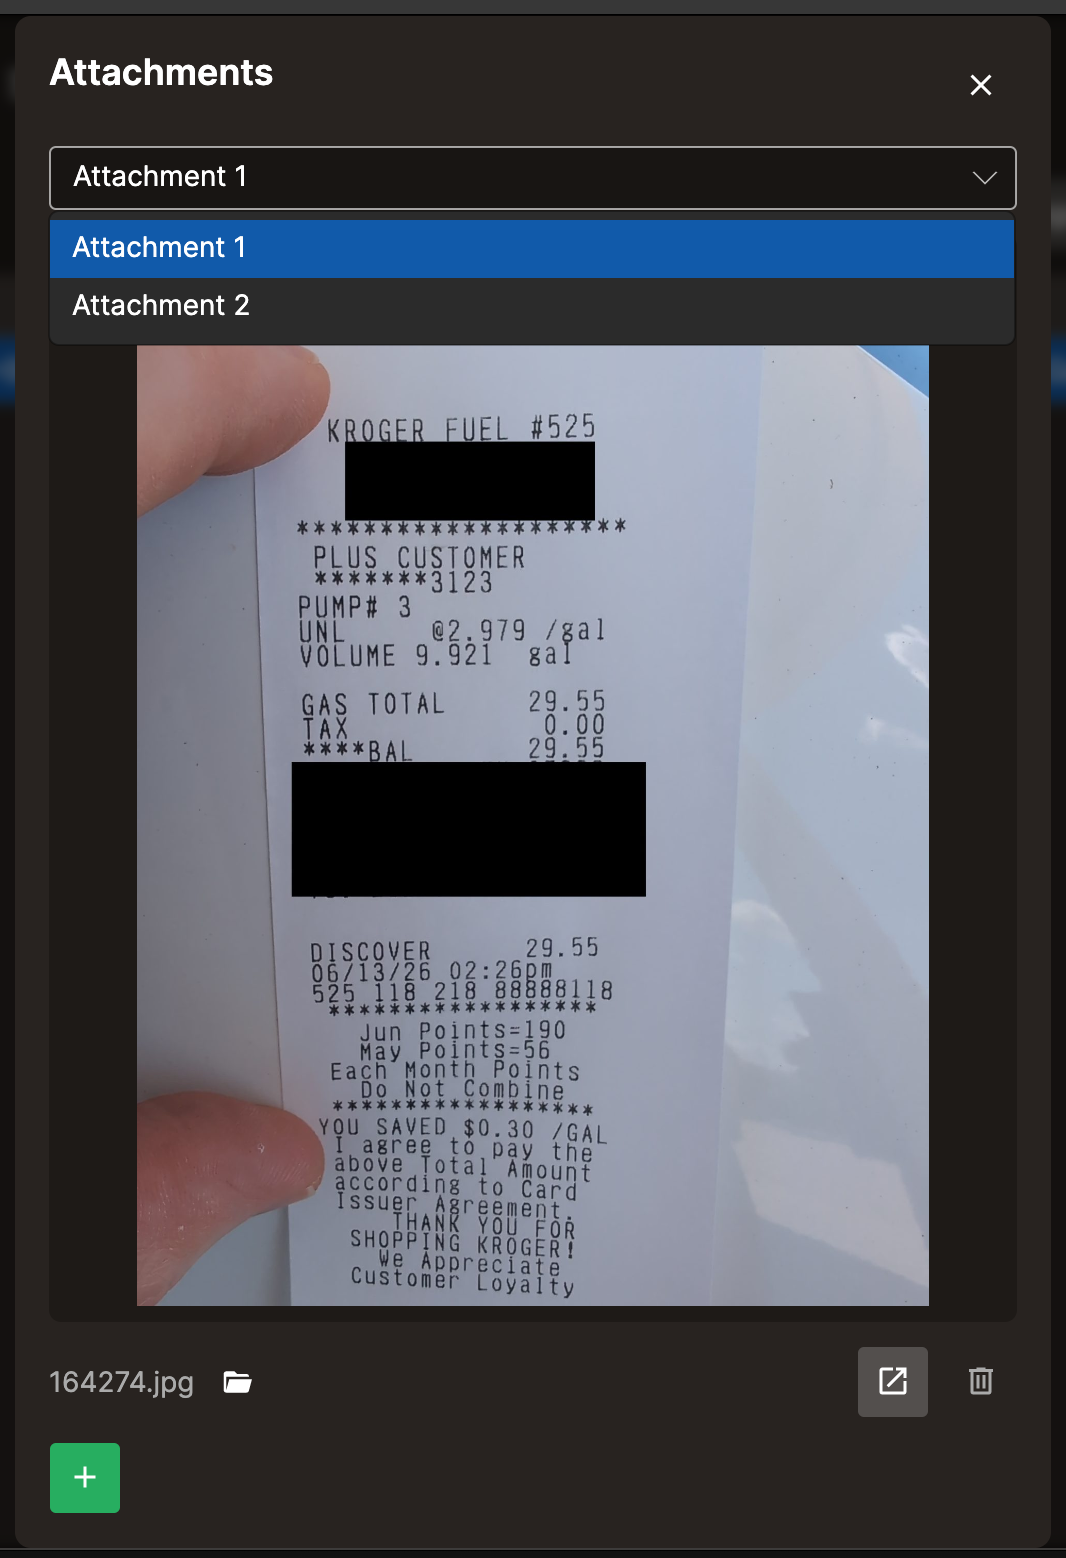
You can attach files to records, such as receipts, invoices, or statements.
Drag and drop. Drop a file directly onto a record row to attach it.
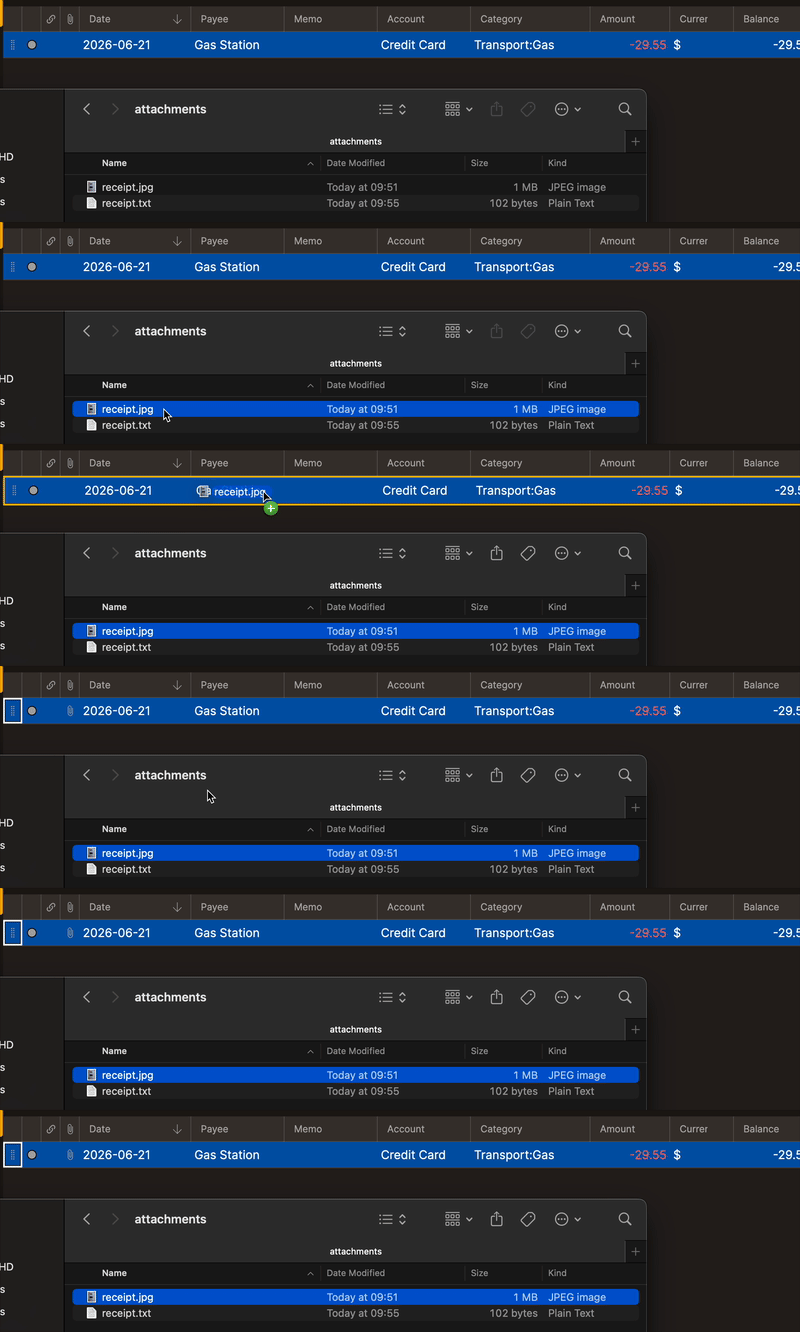
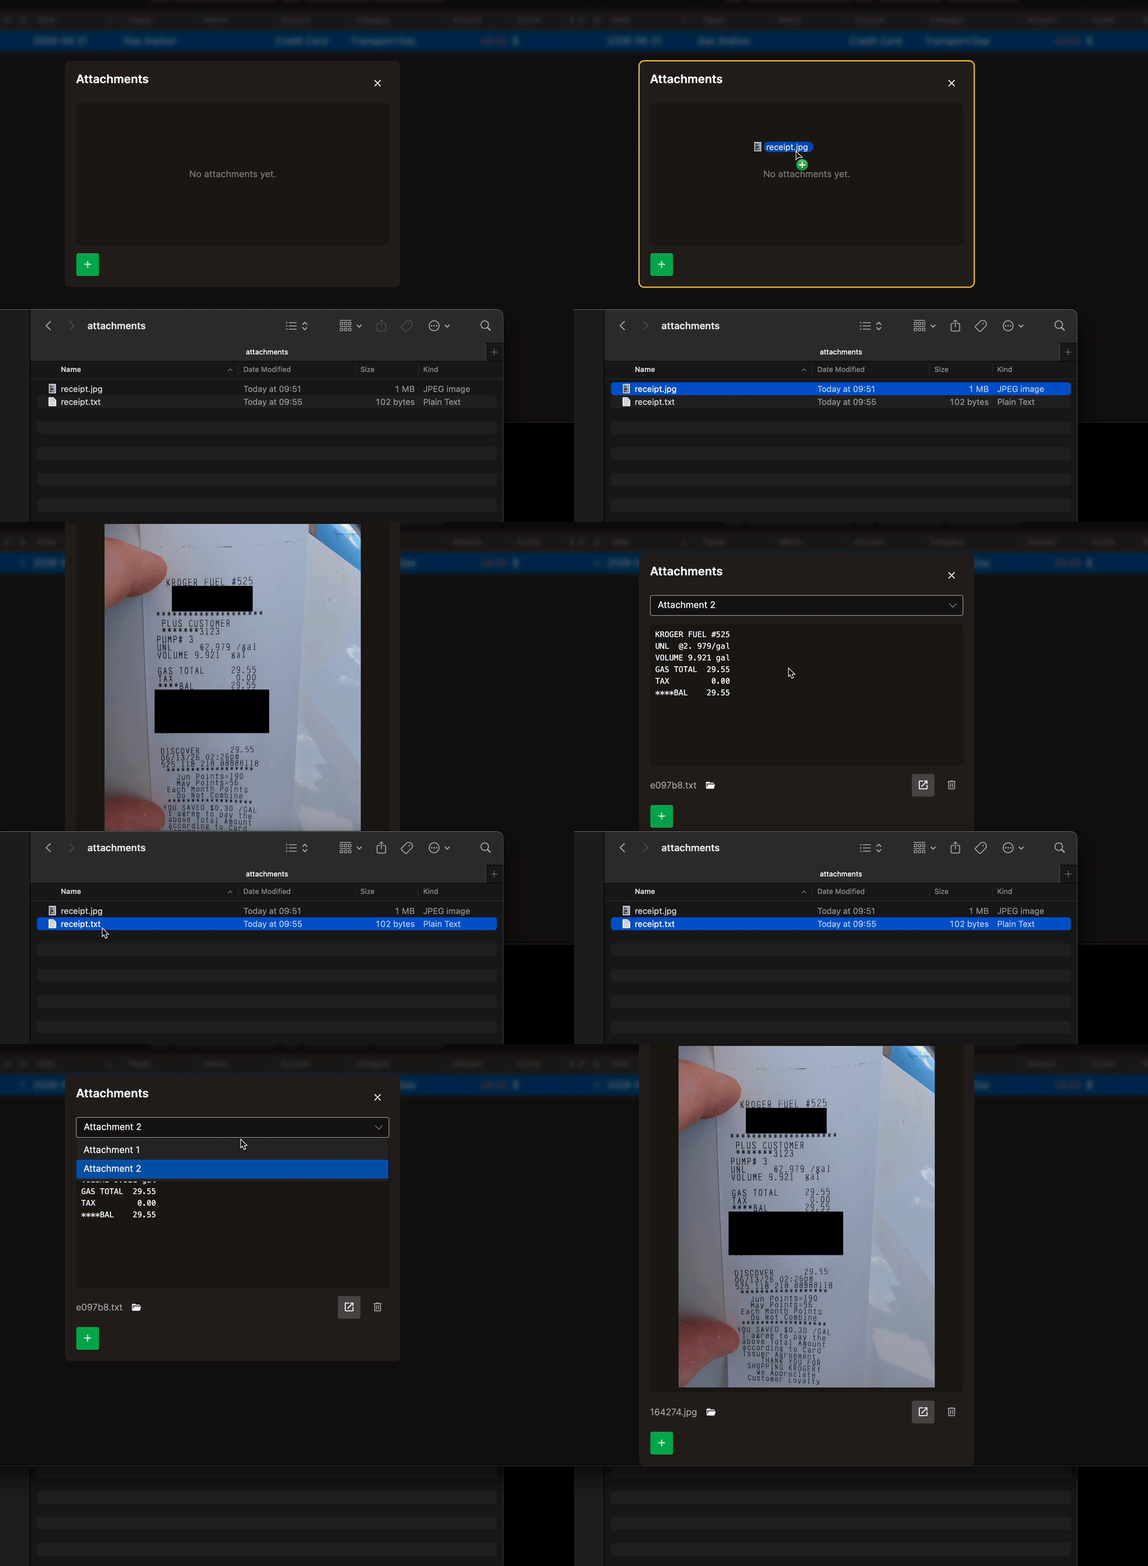
Attachment dialog. Click the attachment icon on a record to open the dialog.

From there, drop a file into the dialog:
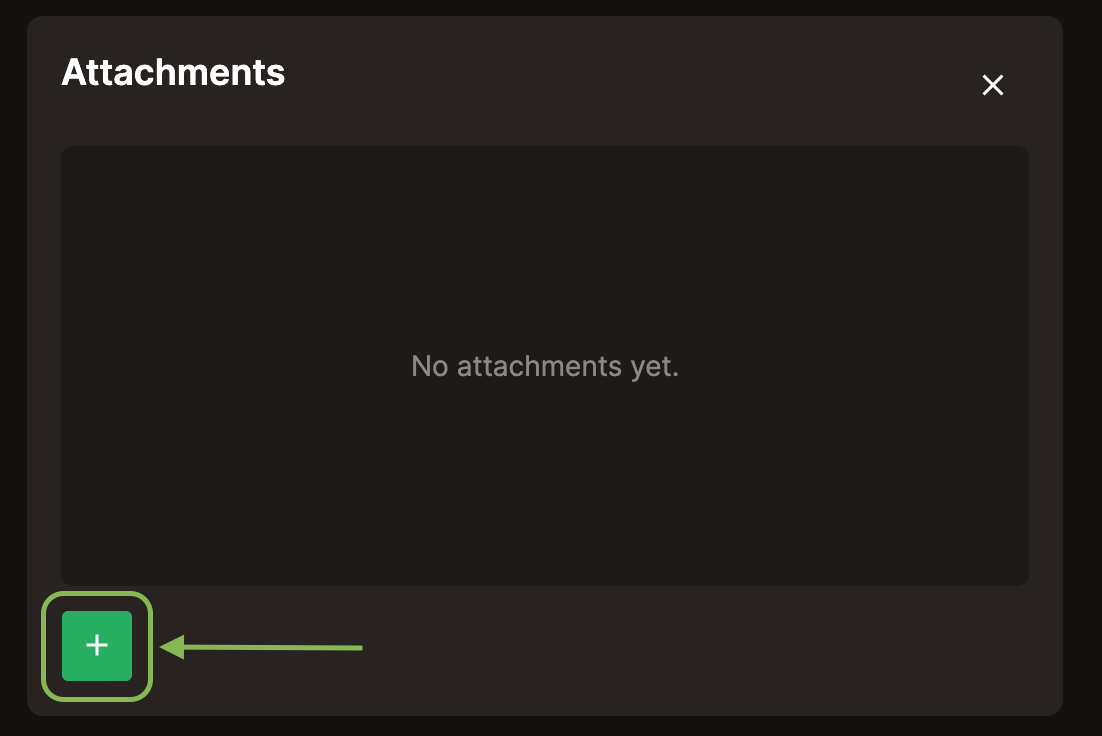
Or click + to pick one.
The dialog displays images and text inline. For other file types, click Open to launch the file in its associated app.
Keyboard shortcuts
| Key | Action |
|---|---|
| Enter | Save current edit |
| Escape | Cancel current edit / cancel pending delete |
| Delete | Mark selected for deletion (first press), confirm (second press) |
| F2 | Enter edit mode on selected cell |
| Cmd/Ctrl+Click | Toggle row selection |
| Shift+Click | Range select |